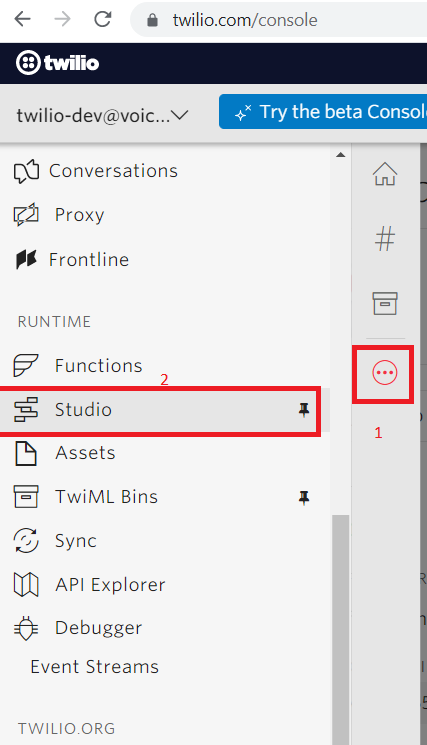
1: Twilio Configuration
Step-1: Create Studio workflow
- Login to Twilio console
- From left Navigation Menu, select the Studio option
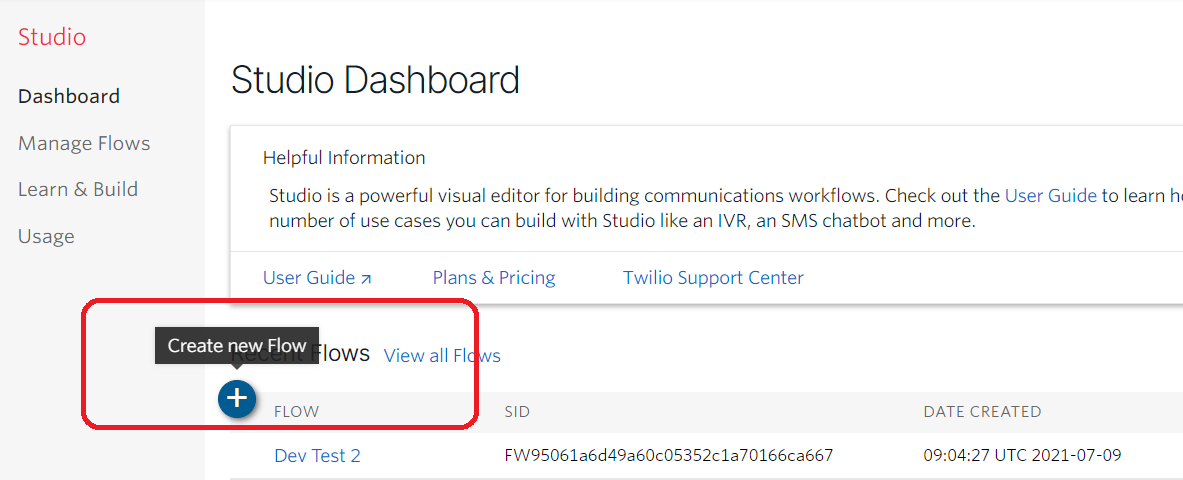
-
- Click + icon to configure the new Studio workflow
-
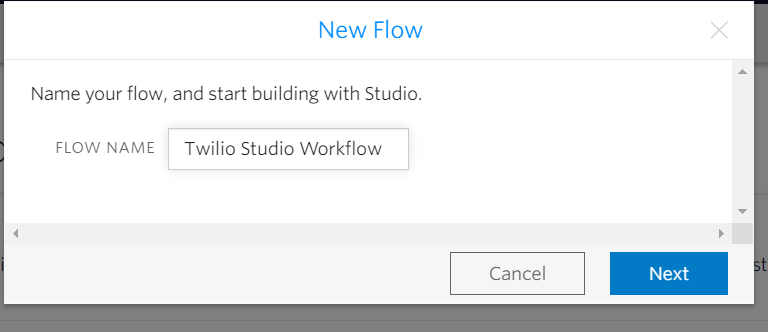
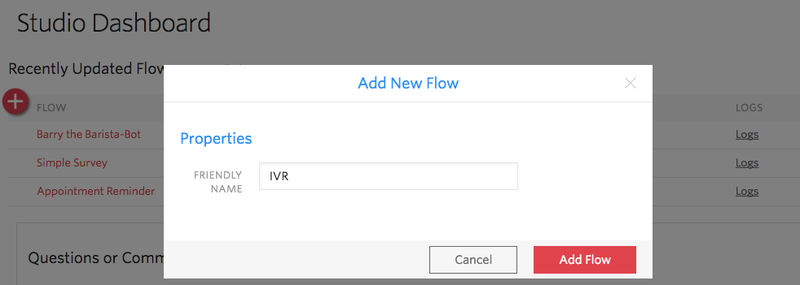
- New Flow popup will open, enter the name and click on next button
-
- Then select the option Import from JSON, click next button
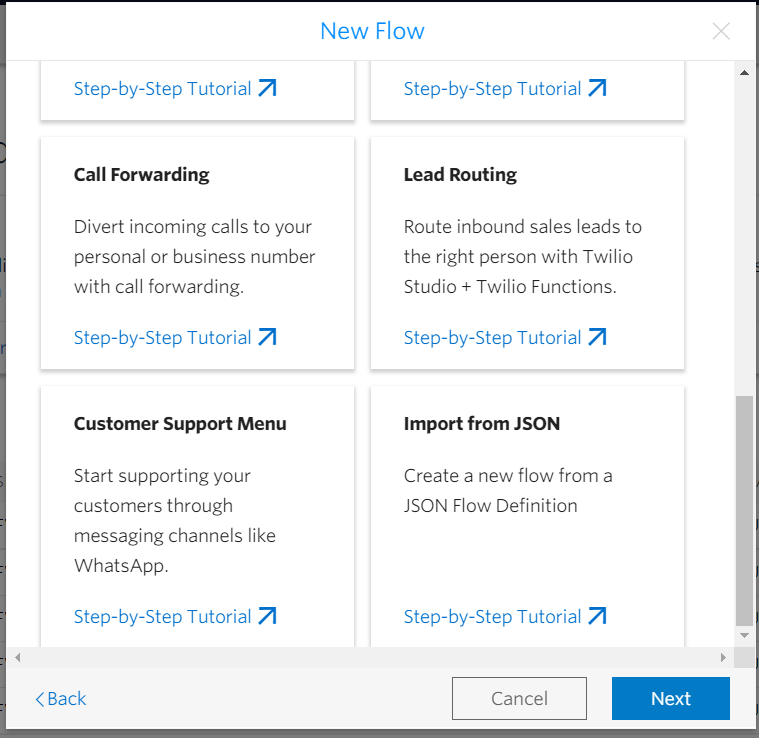
- You will be navigated to next screen of text area where you need to paste the JSON
-
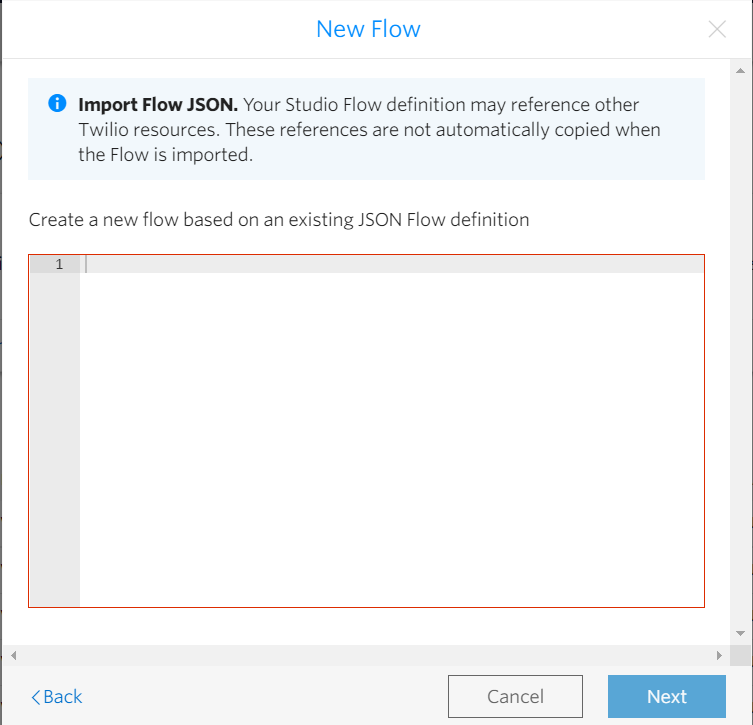
- Paste the JSON in the text area after replacing bearerToken placeholder with the appropriate token value(make sure angular brackets are also removed) and click the Next button
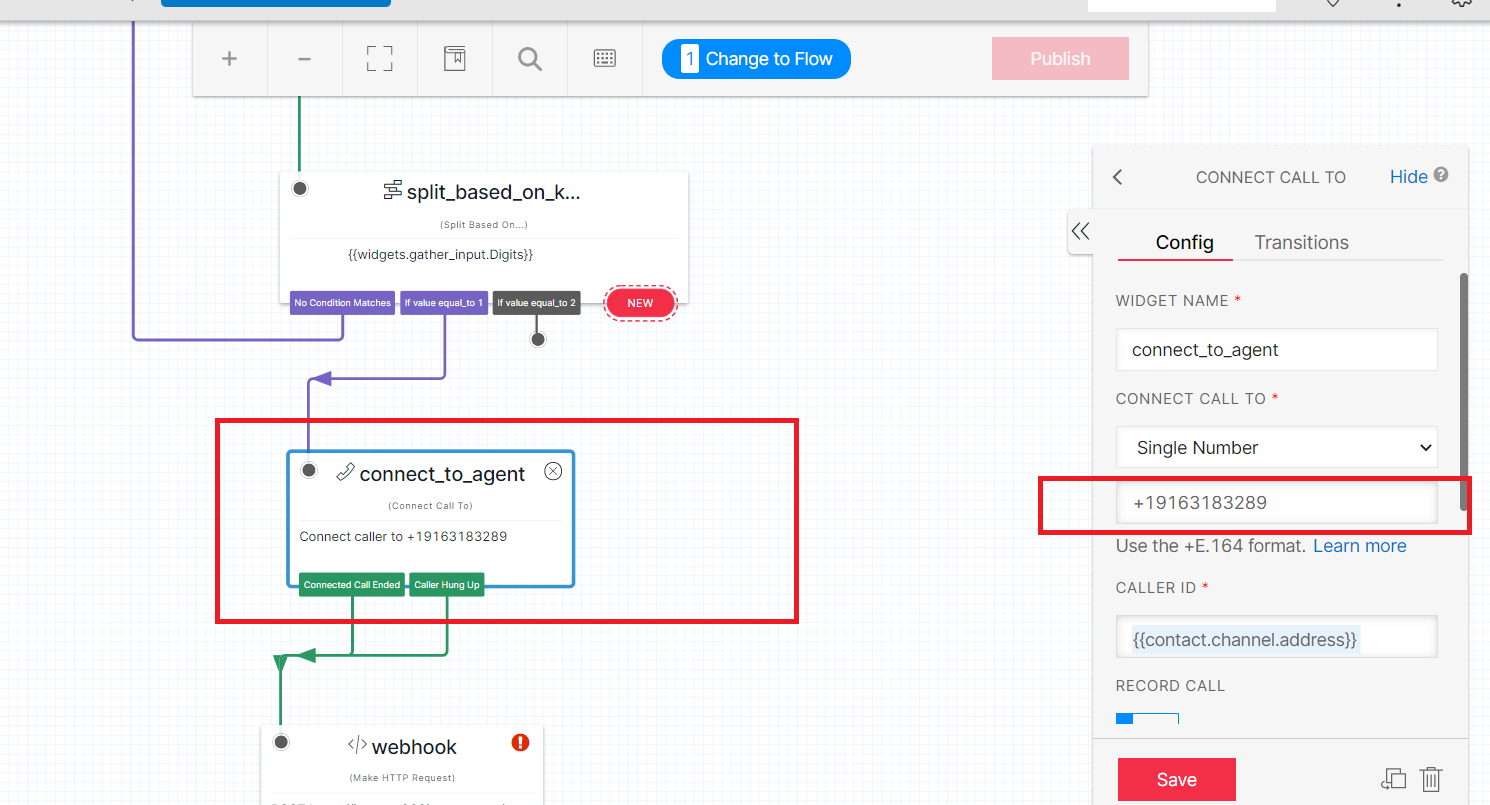
- On the workflow screen, select the Connect to agent widget and change the agent mobile number and click save button
-
Step-2: Configure workflow and webhook
- From left menu, select the Phone Number option and navigate to Active Number dashboard
-
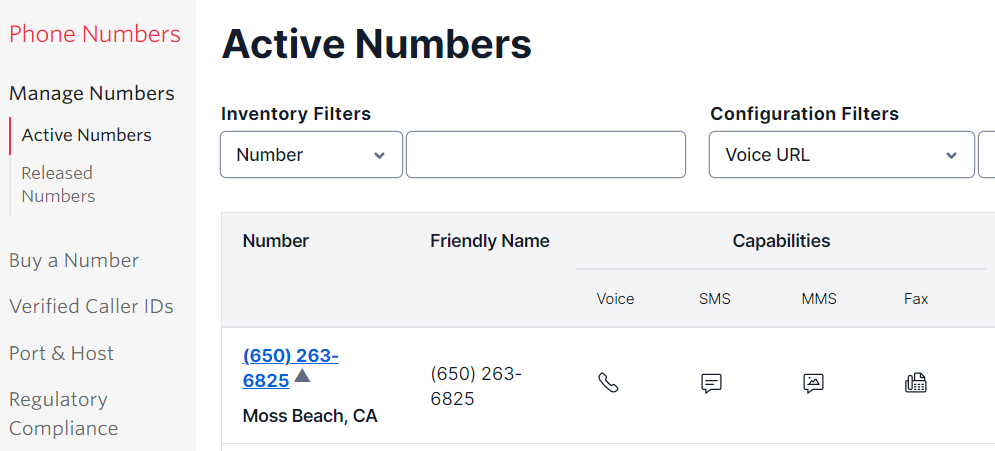
- From the list of phone numbers, click the appropriate phone number and navigate to Configuration page
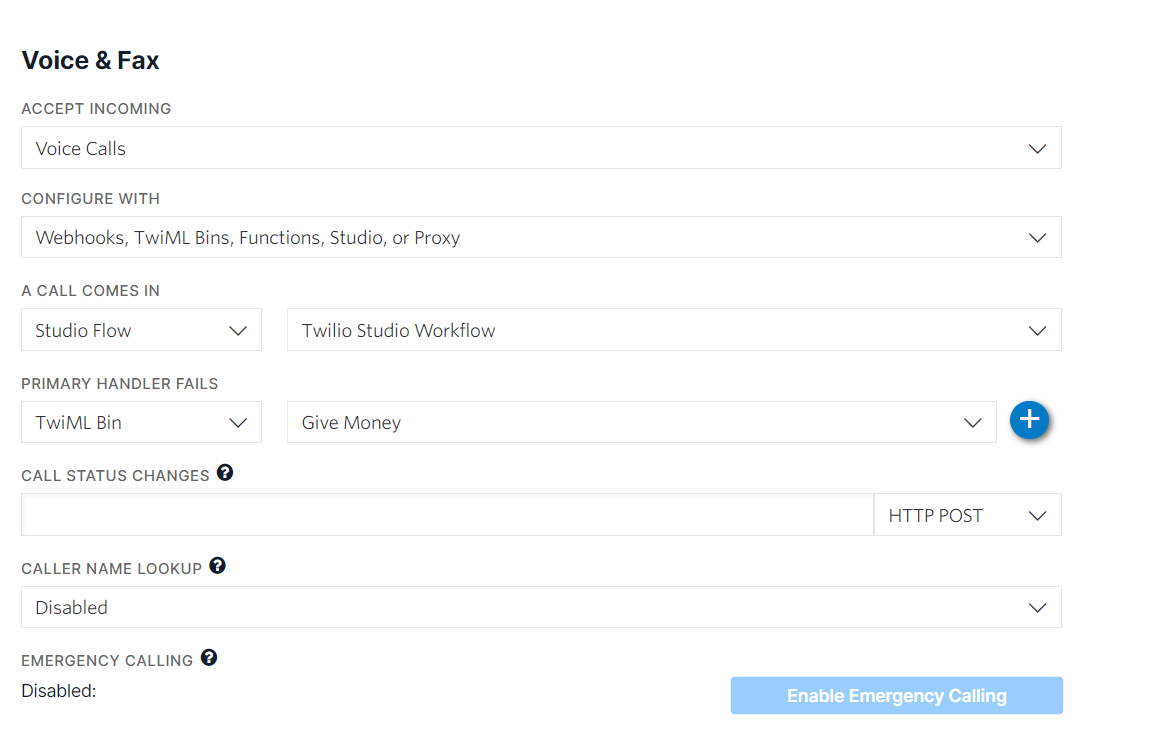
- Under Voice & Fax section, update the values as below screenshot, ensuring that the webhook URL contains the valid token (same url is configured in studio workflow) and save the configuration
-
2: About Twilio Workflow
Twilio Studio information and overview may be accessed here.
3: Create a Twilio Workflow
Create new flow
- Log into Twilio account and navigate to the Studio Dashboard, then tap the + icon to create a new flow. You can name your flow anything you like.
-
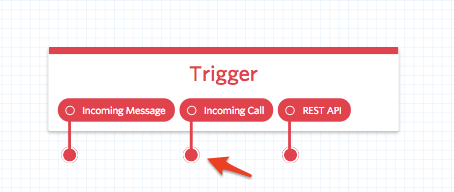
- You’ll notice that the canvas comes with a widget already in place -- that’s the Trigger widget, which kicks off our flow when the trigger we specify is fired. In this case, our trigger is going to be an incoming call, since we want callers to reach our automated menu.
- Gather User Input
- Split Based On Keys
- Export workflow as JSON
- Import workflow from JSON