Get started
If you’d like Copilot Translate turned on for your account, submit your request via this form.
➡️ Currently, if you participate in our Early Access program, self-service configuration via the Management Console isn't available. However, once we turn on Copilot Translate for your account, you can go ahead and assign the appropriate permissions to relevant profiles. Discuss the rest of your configuration needs with your LivePerson representative, so LivePerson can take care of this for you.
Access the self-service configuration UI
➡️ Currently, if you participate in our Early Access program, self-service configuration via the Management Console isn't available. However, once we turn on Copilot Translate for your account, you can go ahead and assign the appropriate permissions to relevant profiles. Discuss the rest of your configuration needs with your LivePerson representative, so LivePerson can take care of this for you.
Apart from permissions, configuration takes place in the Management Console, so to access the self-service configuration UI:
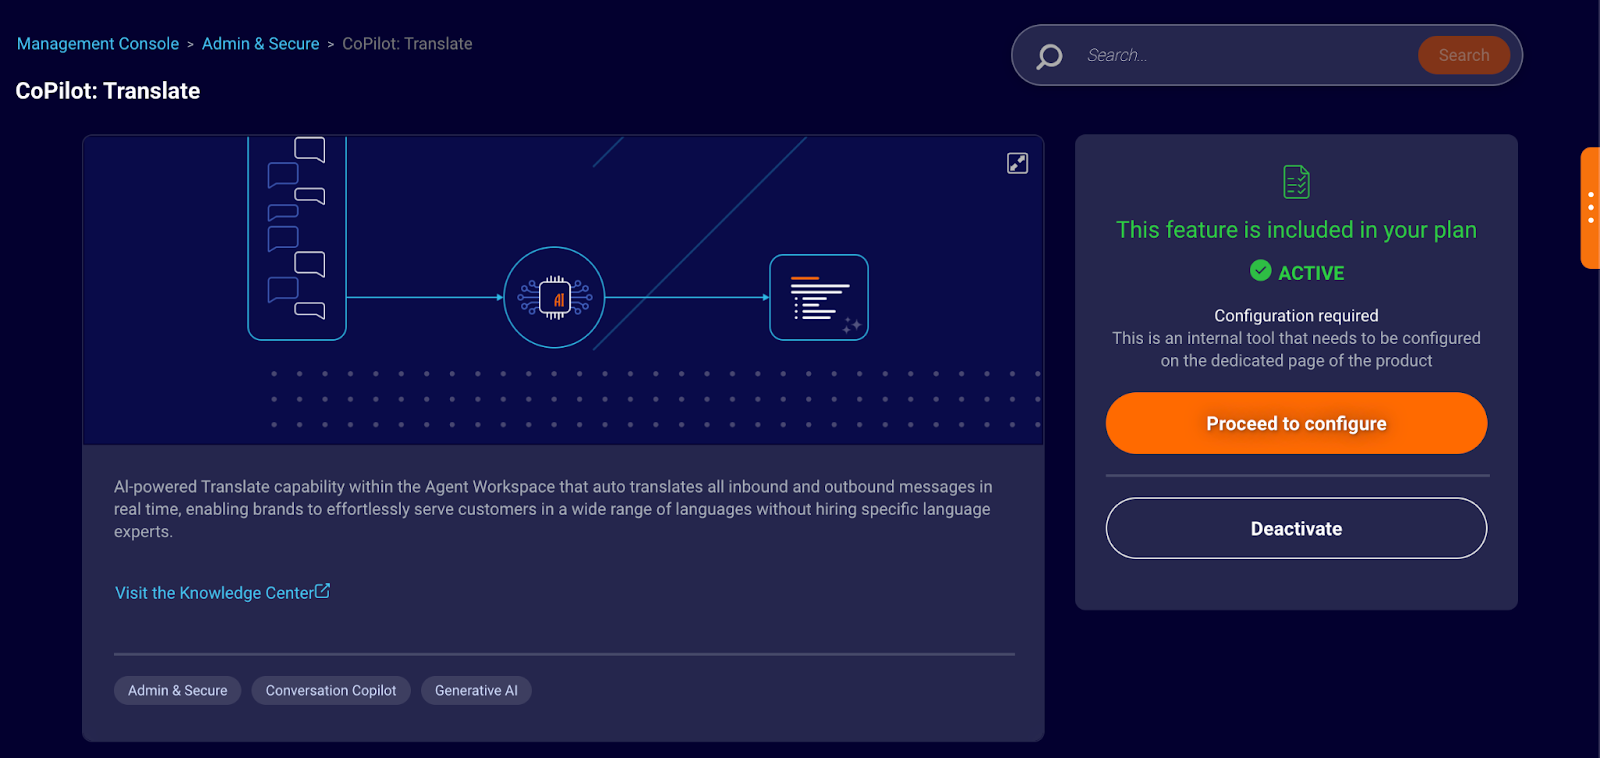
- In Conversational Cloud, click Manage > Management Console.
- Search for “translate,” and select Copilot Translate from the results.
- Click Proceed to configure.

This enables the feature and related permission, and it takes you to the configuration section. (You might need to scroll down to see it.)
Before proceeding with Copilot Translate configuration, assign the related permissions to relevant profiles. This is described next.
Assign permission to profiles
You must enable the following permissions in the relevant profiles (Agent, Agent Manager, etc.) as appropriate for your solution:
- Use Copilot Translate - This allows the user to translate messages.
Assigning permissions to profiles is done via Manage > Users & Skills > Profiles.
➡️ After assigning permissions, wait 10 to 15 minutes before checking for the Copilot Translate feature in the Agent Workspace.
Understand the translation prompt
The translation prompt includes two variables:
{input}
At runtime, this variable is resolved to the message that the LLM should translate.
🚨 Don’t remove the {input} variable. If you do, the message isn’t sent to the LLM for translation.
{language_code}
At runtime, this variable must resolve to a language code that is in the format of a two-letter ISO 639-1 language code, followed by an underscore, followed by a two-letter ISO 3166-1 alpha-2 country/region code, such as de_DE for German, en_US for English, etc.
When translating an agent message (that’s intended for the consumer), this variable is resolved to the language code for the consumer’s preferred language. Copilot Translate uses an LLM to determine the consumer’s preferred language based on recent turns in the conversation.
➡️ For the EA release, when translating a consumer message (that’s intended for the agent), this variable is always resolved to “en_US” for English.
Customize the translation prompt
Prompt customization shouldn’t be necessary, but if you do, there are a few important best practices to keep in mind:
- Don’t remove the variables or change their names.
- Use simple, clear prompts. Avoid over-engineering them with unnecessary detail or complex instructions.
- Test thoroughly, especially if you change the LLM that’s used. The prompt instructs the LLM to return a structured response (in JSON schema), which is important because it’s required for the system to work. But not every LLM performs the same in this regard.
To customize the prompt
- Access the self-service configuration UI.
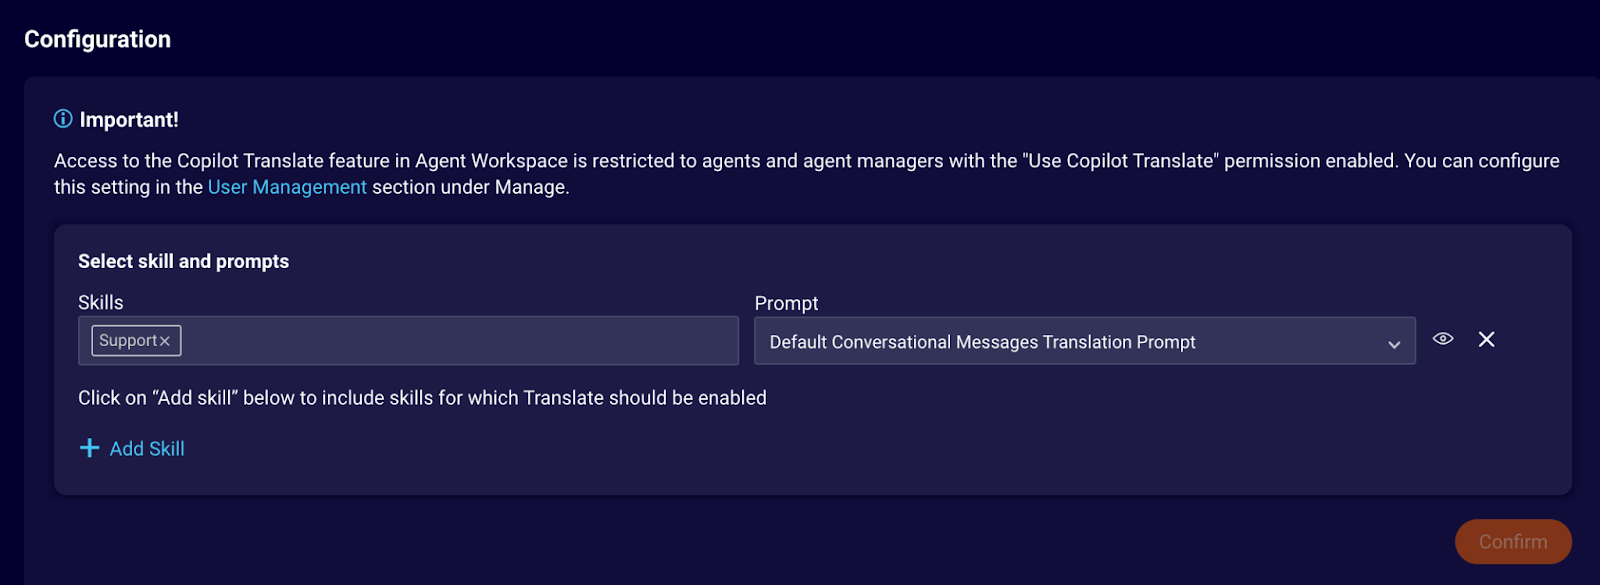
- Under Configuration, click the “eye” icon beside the prompt. This opens the prompt in the Prompt Library, where you can edit it.

Assign translation prompts to skills
Associate the translation prompt or prompts that you intend to use with the skills assigned to your agents and agent managers. A skill can be used only once.
- Access the self-service configuration UI.
- Under Configuration, select the skill(s) and the associated prompt to use.
- Click Confirm.

Test the solution
- Out-of-the-box solution: No special considerations are needed for testing the standard solution. Once setup is complete, test the use cases critical to your brand and verify the translations are as expected.
- Customized prompts: If you modify the prompt—a practice that is not common—you must perform more extensive testing. This is a deviation from the default prompt, which has been thoroughly validated by LivePerson.