The Launcher allows you to create easily accessible Web Links for your agents which provide one-click access to internal/external web pages. The Launcher Link type controls what links appear in the agent experience and how they behave. There are three (3) types of Links supported:
- Global Links: Always visible, across all agent sessions.
- More Links: Extra links tucked into a collapsible menu.
- Toolbar Links: High-priority shortcuts shown directly in the main toolbar
These are great for surfacing key tools like CRM record creation, FAQs, or policy resources—helping agents stay efficient.
Launcher Agent Experience
This section provides screenshots of what your Agents will experience within the LivePerson Salesforce Connector. Steps to configure are below.
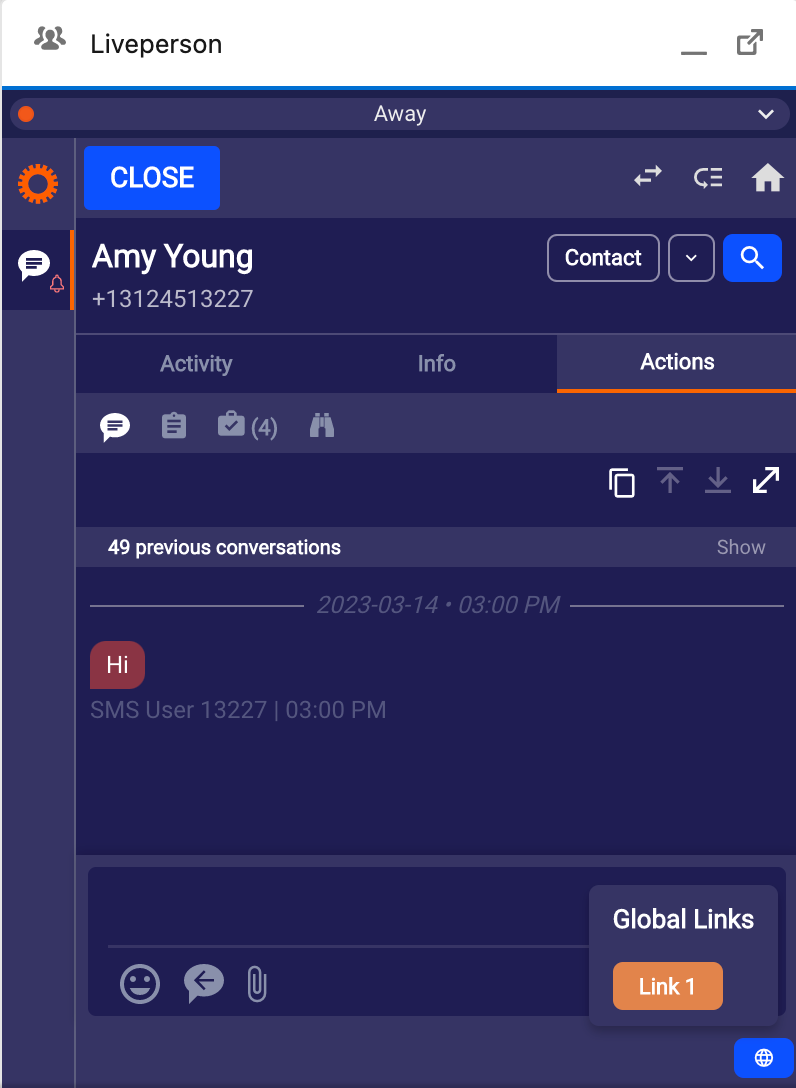
Global Link Menu
A globe displays in the lower-right corner of the UI. Clicking the globe icon opens a list of weblinks.
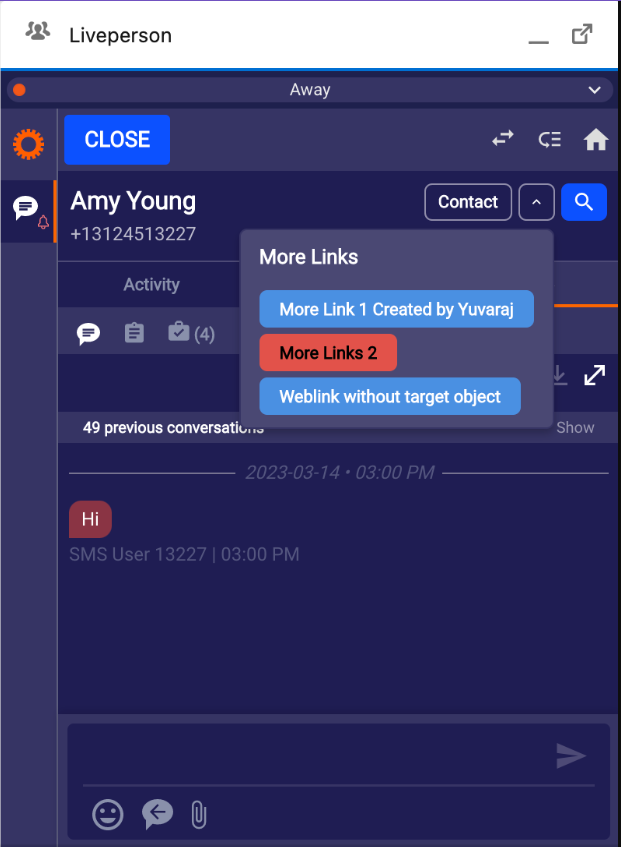
More Links
“More Links” web links will display as a list of links in the More Links section to the right of the contact button. Click the down arrow (caret) to open the menu. Click it again to close the menu.
The links only display during messaging interactions, and will accept attributes for use as parameters in the configured URL. (See configuration below)
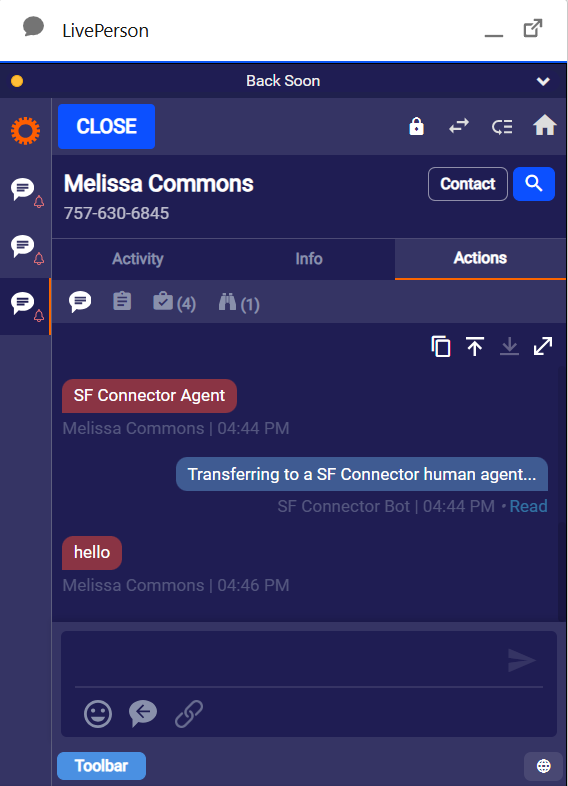
Toolbar Links
Displays in the lower-left corner of the UI. The only display during messaging interaction and supports CRM attributes for use as parameters in the configured URL.
ℹ️ You may have more than one Toolbar link but they will display side-by-side. Spacing is limited so keep that in mind and be sure test, ensuring your agent experience is positive.
How to:
1 - Login to Tenfold Dashboard
2 - Click Features in top, main nav
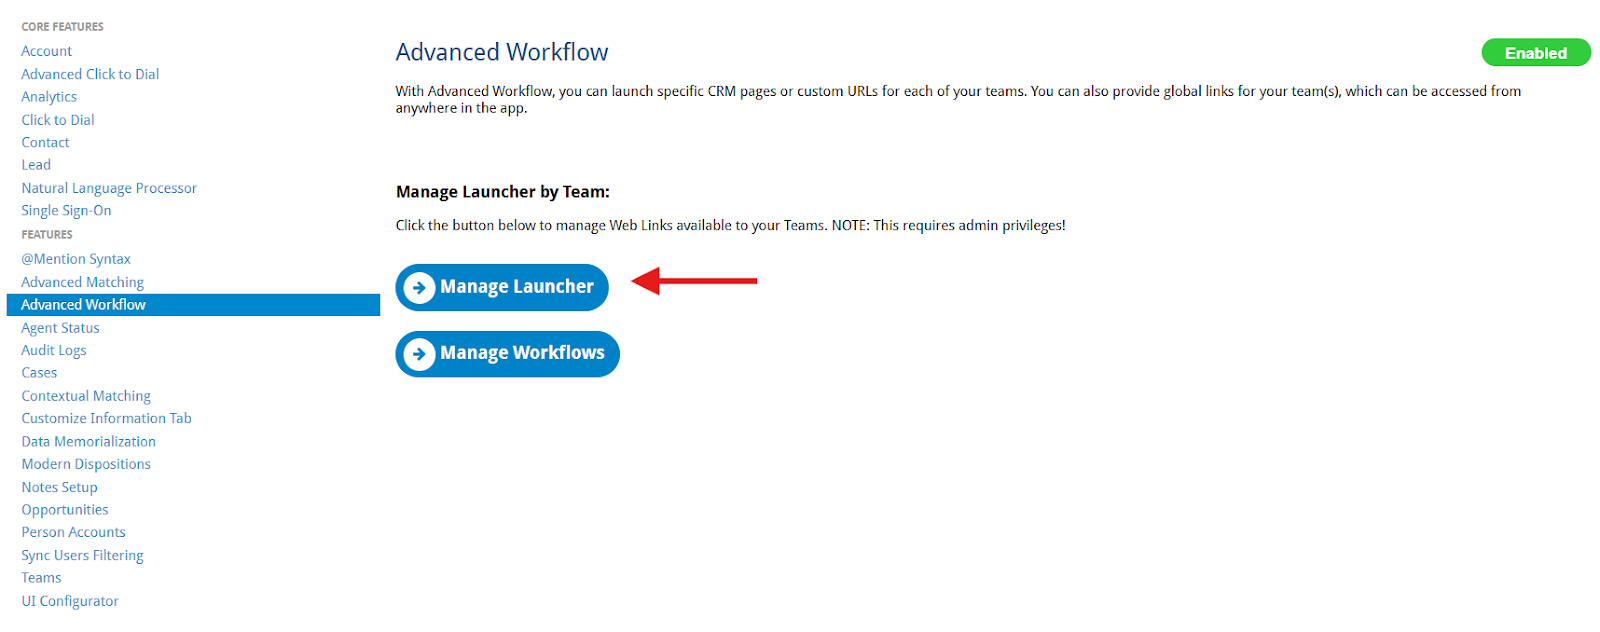
3 - Click Advanced Workflow in left menu, under "Features"
4 - Ensure "Advanced Workflow" is enabled. You will see the green button labeled "Enabled".
5 - Click Manage Launcher
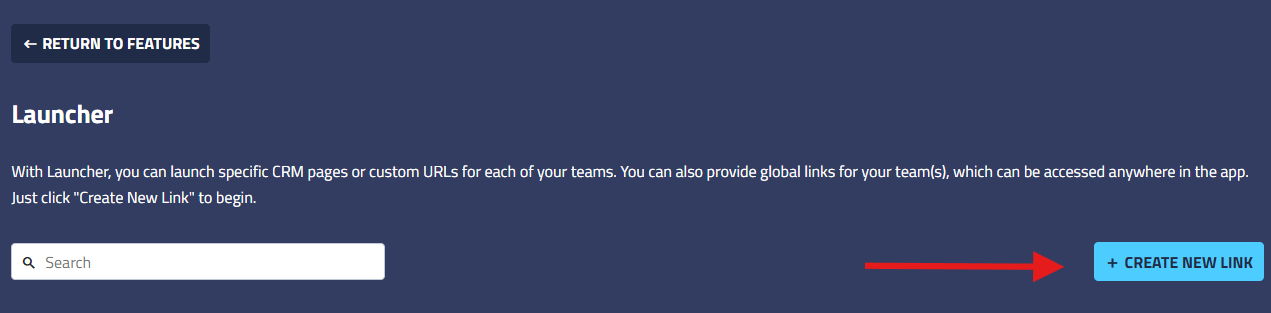
6 - On the next screen, click “+ Create New Link”
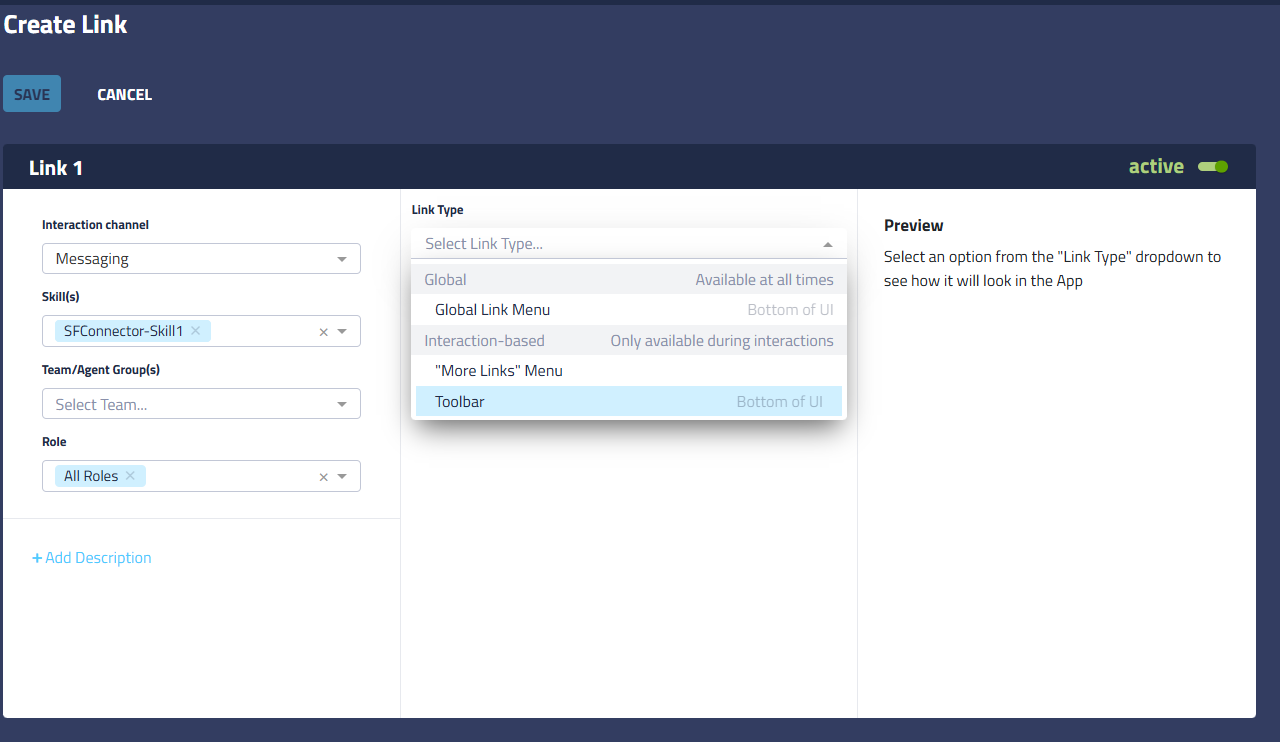
7 - Select Interaction Channel > Messaging
8 - Select the Skill(s)
- Only Skills selected will have access to the link.
10 - Team/Agent Groups and Role do not apply to Salesforce Connector so you can leave those selections blank.
- Once you Save the link, All Users/All Roles will be automatically applied.
12 - Select Link Type
- Global Link Menu
- “More Links” Menu
- Toolbar
💡Remember, the Link Type will determine where in the connector the link displays to the agent user.
13 - Select your link text color and background
- The preview will display an example in real time
ℹ️Note: The editor preview uses Tenfold Voice UI as an example; however, its appearance differs from the Salesforce Connector. The link display will still apply.
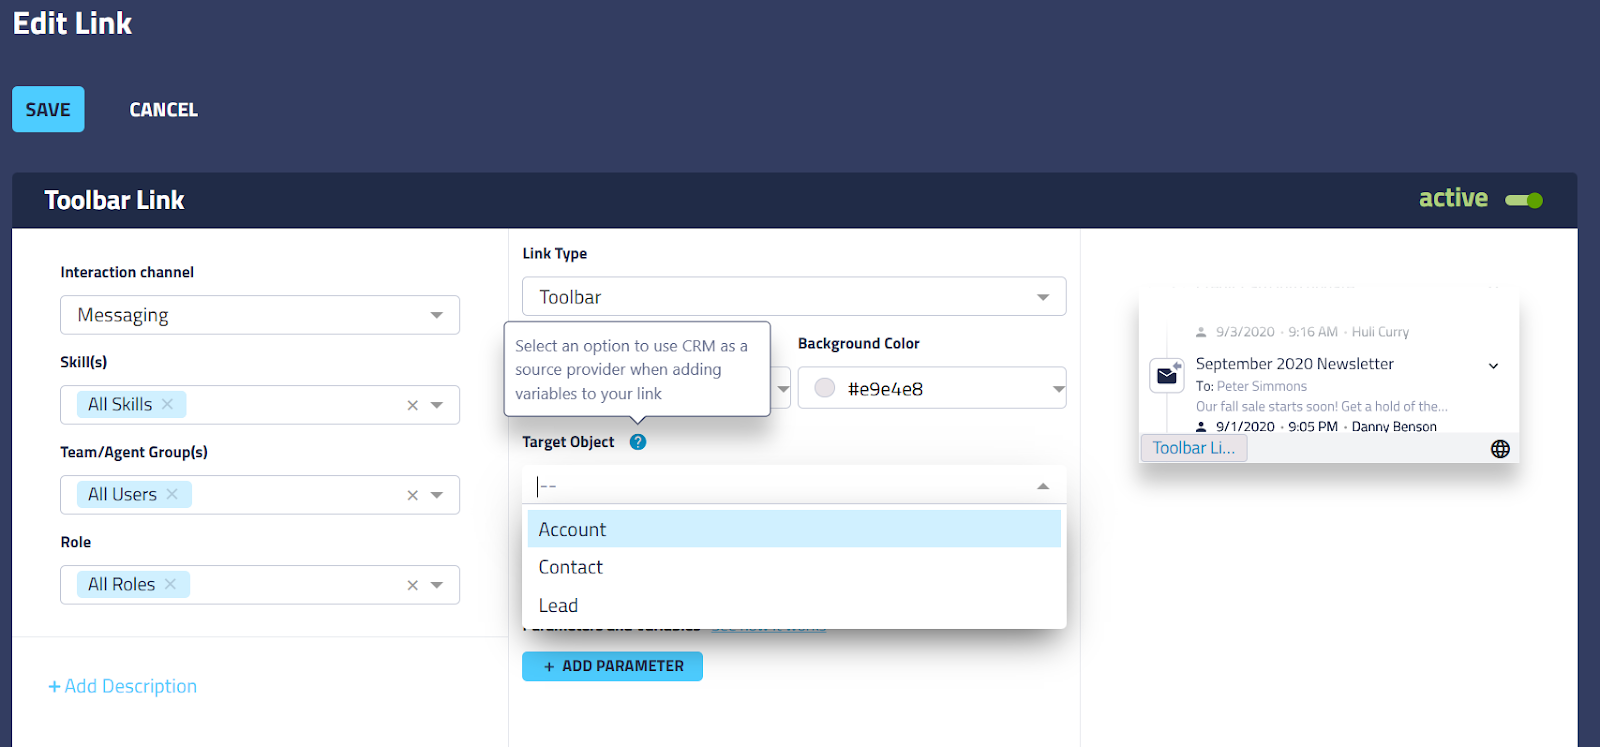
14 - For Toolbar and More Links only, select Target Object (optional)
- This will allow you to specify the source of your link parameters.
ℹ️ Tip: Different systems require different parameters in the URL to perform searches or other tasks. It's helpful to try pasting your URL from the URL preview field into your browser address bar before saving your workflow. Testing while you're editing can save time when constructing your URL and parameters.
15 - Enter URL & Parameters
ℹ️ Note: Be sure to include the protocol (http, https).
16 - Give your link a Name and Description (optional)
17 - Click Save
18 - Refresh the UI and Test
Example 1: Weblink using default parameters
The parameters included with the weblink workflow offer some common CRM information you can use in conjunction with URLs.
- This example will search Google for a consumer's name.
- To include this information:
- First field = q
- Middle field = Call
- Third field = Phone Number
- In this example, user.name (user name for the record in context) defines the CRM object and property to search for.
- The variable name q is needed to supply the search engine with the CRM value.
- Other URLs may require different parameters, so try setting up an example in the address bar of your browser first to see how the query looks before attempting to configure it in Tenfold.
- Every time the user clicks the link, the browser will submit these parameters along with the URL. However, since the phone number depends on the object currently in context, the value submitted will vary.
- Click Save to apply your changes.
ℹ️ Note: , you may also select a variable from the User, Organization or Chat dropdown to pass specific parameters in the URL. The Chat dropdown does not appear for the Global links because the Global links show outside of the context of the Conversation as well.

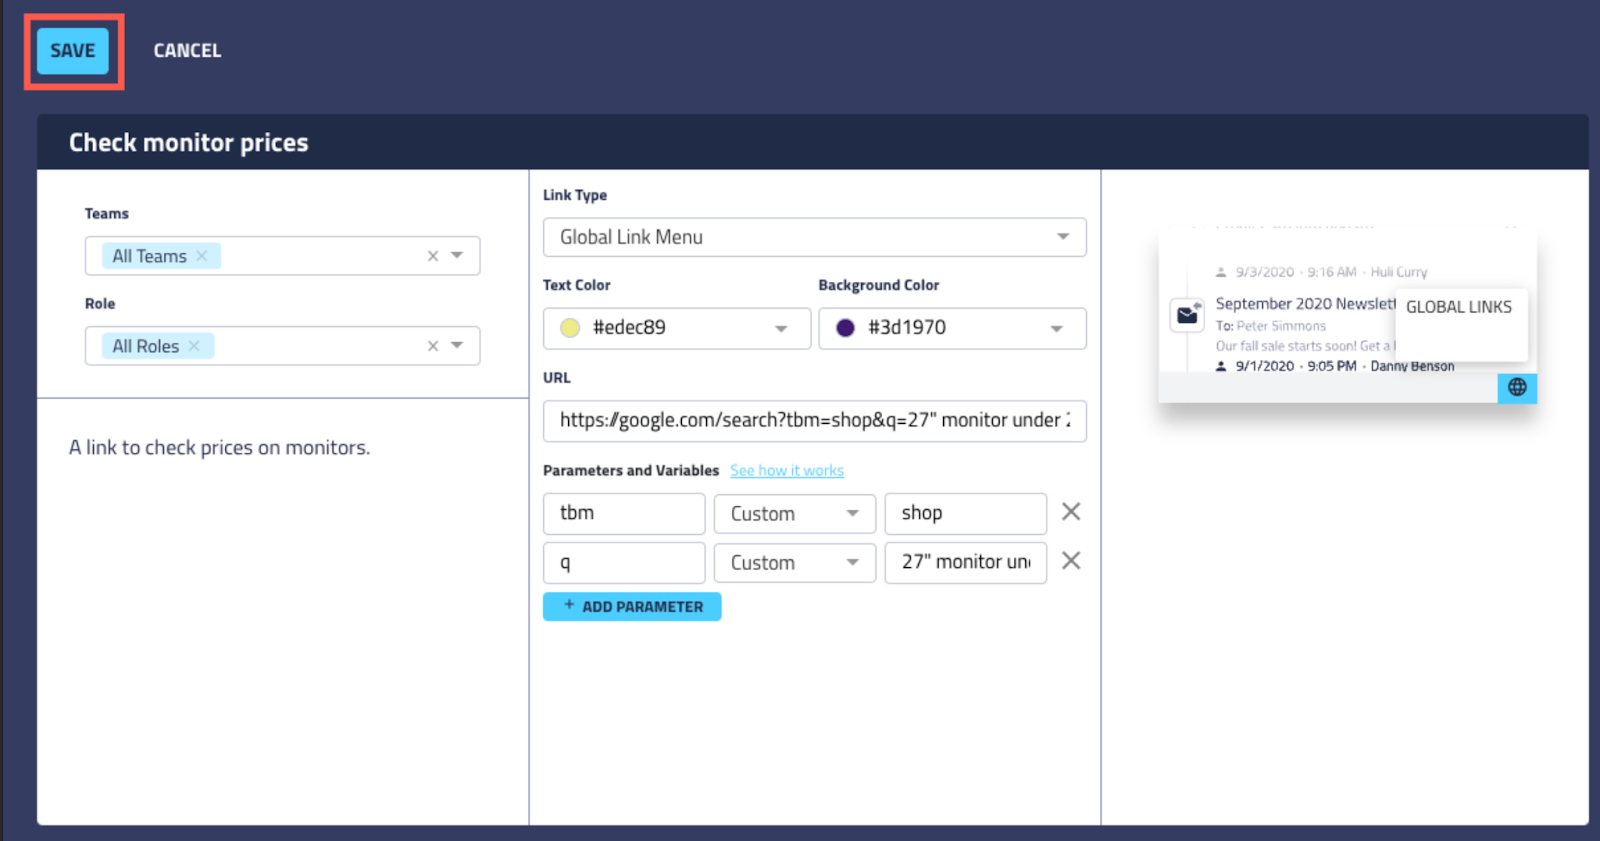
Example 2: Weblink Using Custom Parameters
This example uses the Global Link Menu.
- Enter the URL in the URL field.
- Example 2. Simple URL to open https://shopping.google.com
- Click +Add Parameter to add any parameters and variables you want to include.
- The custom parameters search for a specific type of item.
- Note that each row includes an additional parameter.
- The parameters you can use depend on the website's support and configuration.
- This configuration searches for 27" monitors costing less than $200.
- tbm = required parameter in Google to direct the user to the shopping area
- q = required variable name in Google used to hold the value to search for “ 27" monitor under 200” which is the value of the variable q.
- Click Save to apply your changes.
- Be sure to refresh your UI if you are logged in to your CRM while editing the link.
ℹ️ Tip: Different systems require different parameters in the URL to perform searches or other tasks. It's helpful to try pasting your URL from the URL preview field into your browser address bar before saving your workflow. Testing while you're editing can save time when constructing your URL and parameters.
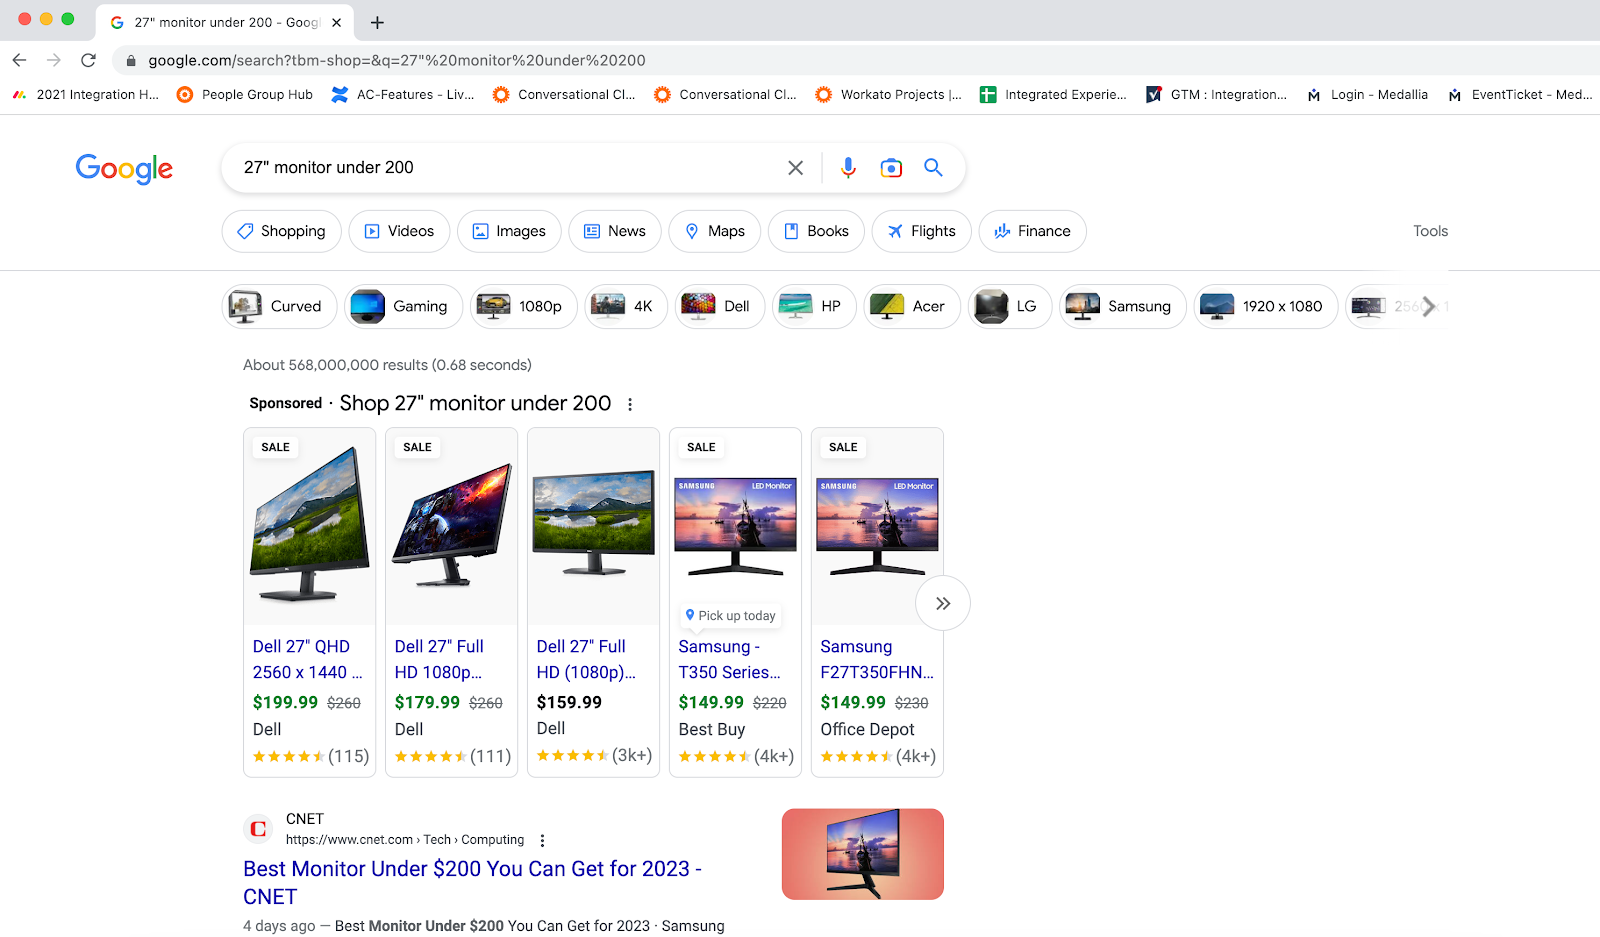
Weblink Example 2 In Action
The link appears to the Agent user in the selected colors with the title text. It is accessible under the globe icon as illustrated above.
Clicking the link opens a browser tab, opens the Google search and automatically inserts the query in the address bar.
Launcher Variables
Workflow Launcher includes menus for selecting parameters to use in webLink workflows. The standard list includes the following variables:
ℹ️ Note: Your list may include customized parameters specific to your organization.
Table 1. Launcher parameters (standard) supported in webLinks. Additional variables configured in the Attached Data feature are made available on the Chat object.
Object | Property | Description |
|---|
Chat | Channel Name | Indicates a channel that was used for the communication during a conversation. |
| Consumer Email | Consumer's email if received in LivePerson. |
| Consumer Phone | Consumer's phone if received in LivePerson. |
| Start Time | A date and time when the conversation started. |
| End Time | A date and time when the conversation ended. |
| External ID |
|
| Skill ID | Agent’s skill. |
| Skill Name | Agent’s skill. |
| Chat Status | The status of the conversation. |
User | Name | Name of the logged in Tenfold user. |
| CRM Unique Id | Unique identifier assigned by the CRM to the logged in Tenfold user. |
| CRM Username | Unique username for the CRM user. |
| Username | The Tenfold username of the currently logged in Tenfold user. |
Organization | Company | Name of the logged in Tenfold user's company as defined in Tenfold Dashboard under Company Settings. |
| Locale | The locale of the currently logged in Tenfold user. |
| Timezone | Time zone of the logged in user as defined in Tenfold Dashboard under Company Settings. |
| Created At | Timestamp of when the user object was created in the Tenfold platform. |