Payments are an important part of eCommerce transactions, and it’s likely that you’ve been using one or more, well-tested payment systems as a part of your eCommerce operations for a long time. As you move from eCommerce to cCommerce (Conversational Commerce), it’s natural for you to want to leverage these payment systems (PayPal, WePay, Stripe, Square, etc.) and related integrations in which you’ve invested. For example, you might have a complex checkout flow that you want to reuse, or a loyalty program that you want to continue. To help with the transition from eCommerce to cCommerce and to meet this need, LivePerson offers a feature known as “Bring Your Own Payments” or BYOP.
BYOP is a simple integration feature that connects your existing payment system to LivePerson’s Conversational AI within the conversational flow.
The Consumer Experience
With BYOP, the consumer’s commerce experience is similar to that in eCommerce transactions.
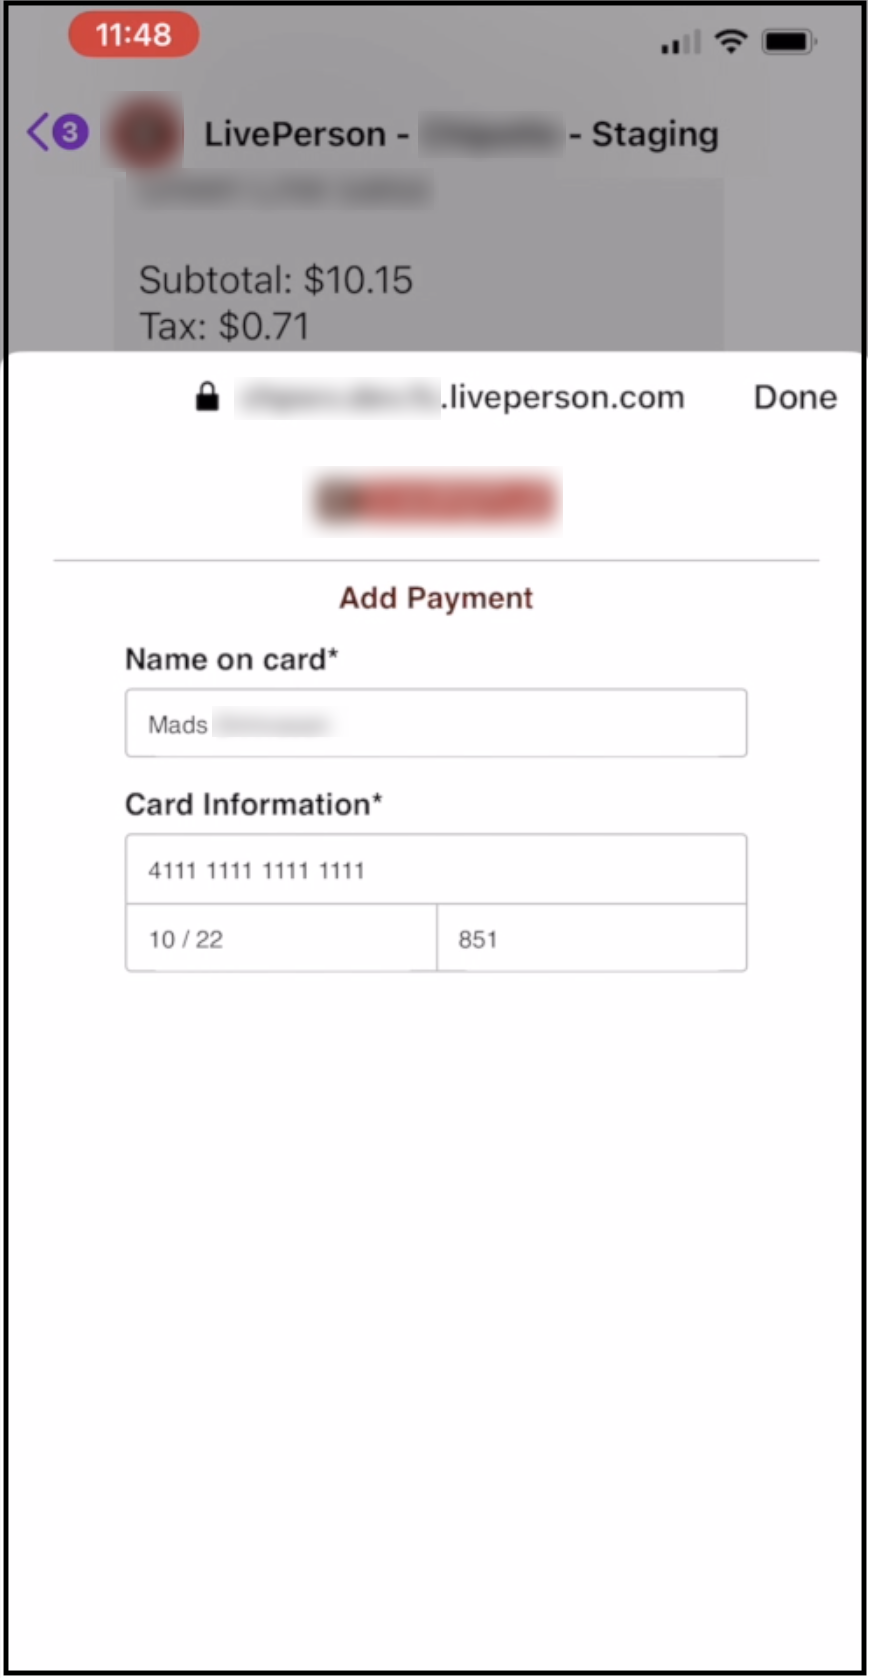
In mobile messaging channels, the payment form is displayed as a pop-up. Once the consumer enters their credit card information and submits the form, the form closes, and the consumer is returned to the main conversation. This experience is shown below:
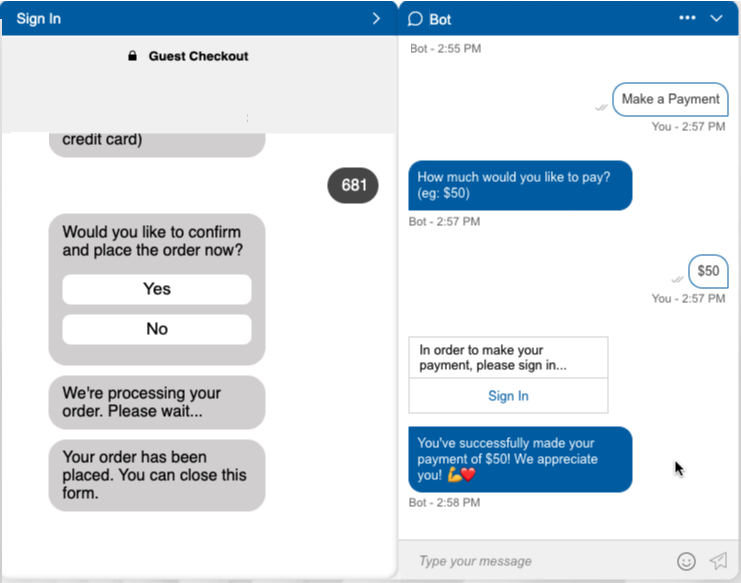
In the Web channel, the payment form is displayed in a non-intrusive, slide-out window. Here again, once the consumer submits the form, the form closes, and the consumer is returned to the main conversation. This experience is shown below:
The end-to-end flow
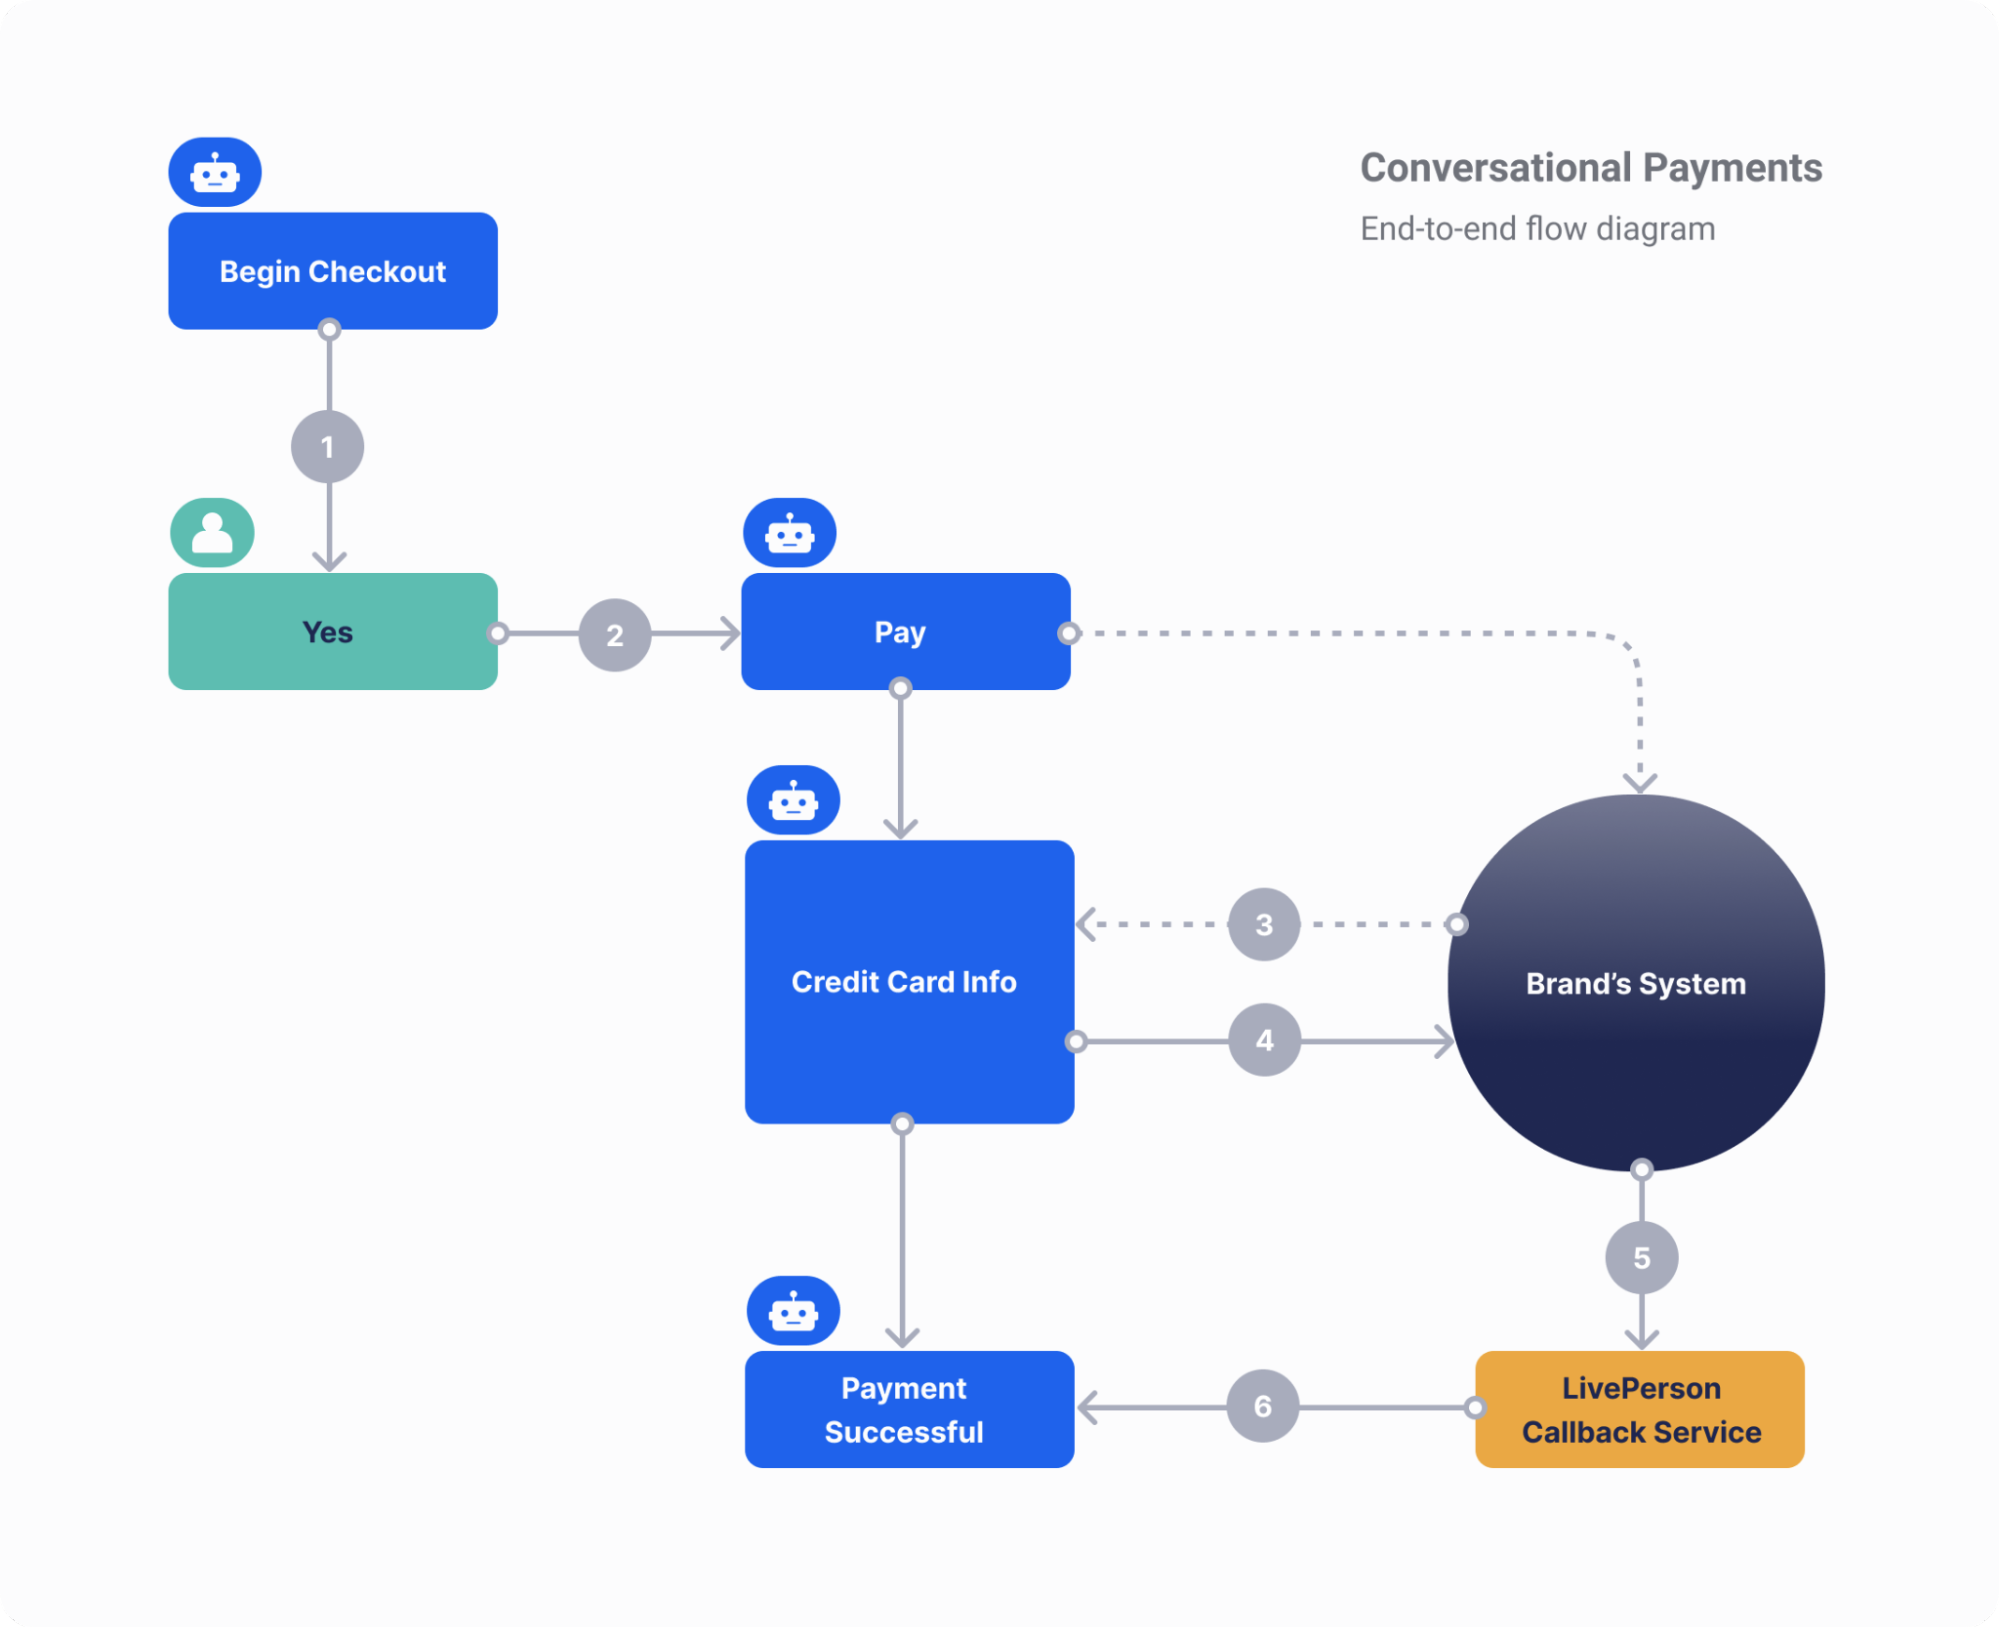
- During the conversation, the consumer selects the item to pay for. The bot presents the total amount and asks for the consumer’s confirmation to pay.
- The bot presents the consumer with a link or button to a payment form hosted by you.
- The consumer clicks the link or button that presents the form.
- The consumer provides their credit card information: name, credit card number, expiry date and CVC number. Then they submit the information to your payment service. Along with the credit card data, metadata such as SKU number, total amount and context data (user id, bot id and conversation id) is sent to your system.
- Your payment service processes the payment and calls back the bot by invoking LivePerson’s Callback Service (our external Web forms integration API) .
- The Callback Service returns the consumer to the appropriate place in the conversation. The transaction’s success or failure and the order details received from your payment system are sent to the consumer.
Privacy
In a BYOP implementation, the consumer’s credit card information is never stored in LivePerson’s environment. The payment form is hosted in your secure environment. The bot simply fetches the form and presents it to the consumer. The data entered by the consumer is submitted directly to your system.
Setup
BYOP’s Callback Service is implemented using our external Web form integrations API.
Implementation tip: The slide-out window shown farther above is achieved using the “Slideout” option in the button settings of a Structured or Button question. Take advantage of this option (in the Target setting in specific). It affords a tightly integrated and attractive consumer experience; therefore, it’s often preferred in a cCommerce scenario.
Learn more with this example guide:
Example guide
This guide provides a sample implementation for this API.
Step 1: Information needed
In order to call the Web View Integration API, the following data is needed:
- Bot ID
- Conversation ID
- User ID
- Message (optional)
- Context variables (actual data to be passed)
- A hosted form with the API integrated (detailed below)
The Bot ID can be found in LivePerson Conversation Builder in the bot's Bot Settings (expand More Settings).

The conversation ID can be retrieved with the botContext.getConversationId() method in bot code.
The user ID can be retrieved with the botContext.getUserPlatformId() method in bot code.
Note: If you're using a platform that already has access to the conversation ID and/or user ID (such as LivePerson Functions), you can simply take them from there.
Step 2: Set up the form link in Conversation Builder
In this guide, we'll be passing the required data to a URL with the bot ID, conversation ID, and user ID in the query string. The URL format will look like this:
http://{formUrl}?userId={userId}&convId={convId}&botId={botId}
We'll use the methods mentioned above to construct the URL.
In the Global Functions of our bot, we’ll use the code below to retrieve the necessary data and then set the URL in the bot variable formURL, which we’ll use later to provide a link to the user to fill out the form.
function __initConversation() {
 var userId = botContext.getUserPlatformId();
 var convId = botContext.getConversationId();
 var botId = '7a4e10287a6b90cee1de9910f0b5010985eef16a';
 botContext.setBotVariable('formURL', 'https://static-assets.dev.fs.liveperson.com/cb_test/web_view_test/web_view/index.html?userId=' + userId + '&convId=' + convId + '&botId=' + botId, true, false);
}
Step 3: Send the form link to the visitor
In the bot, we have a simple dialog to present the form link to the visitor. The dialog has a simple pattern match for triggering.
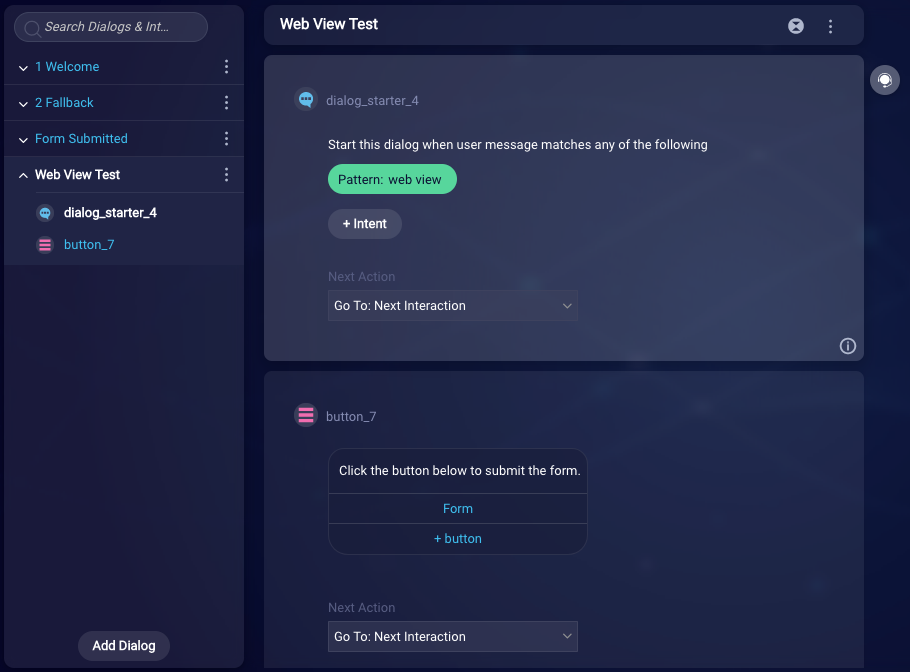
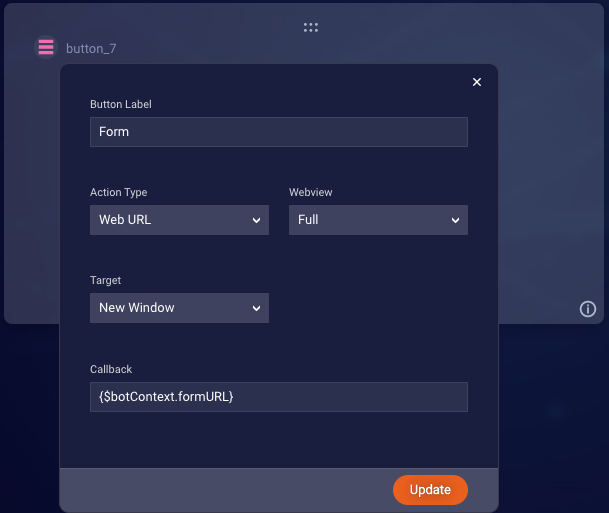
The dialog also has a single Button Question interaction with a single button. This button uses the formURL bot variable that was created in the Global Functions as the Callback. This way, when the visitor clicks the button, they will be directed to the form URL.
Step 4: Call the API from the browser
For the purposes of this guide, we created a simple HTML page, with a basic form, in order to submit some collected information back to the bot. We are not performing any validation, but you might want to do so in your form.

After the user fills out the form, the method below is called to submit the data back to the bot. We retrieve the data from the query string, then retrieve the form data, then set the domain and authorization, and finally post data to the bot.
// Post data when form is submitted
submitForm = async function() {
 // Get data from query string
 const queryParams = new URLSearchParams(document.location.search);
 const userId = queryParams.get('userId');
 const conversationId = queryParams.get('convId');
 const botId = queryParams.get('botId');

 // Get data from form
 const name = document.querySelector('input[name="user_name"]').value;
 const color = document.querySelector('input[name="favorite_color"]').value;
 const swallow = document.querySelector('input[name="unladen_swallow"]').value;

 // use correct domain for your region
 const domain = 'https://va.bc-intg.liveperson.net/thirdparty-services-0.1/webview';
  // encode auth string
 const authString = `${conversationId} || ${botId}`;
 const auth = await sha256(authString);

 const res = await postData(domain, auth, {
   botId,
   conversationId,
   userId,
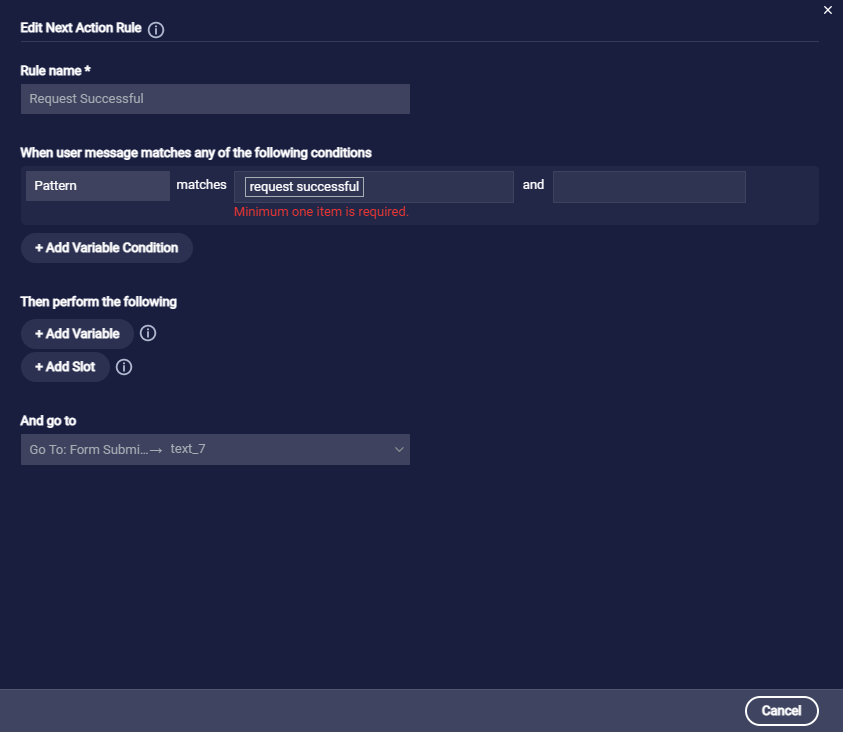
   message: "request successful", // optional
   contextVariables: [
     {"name": "name", "value": name},
     {"name": "color", "value": color},
     {"name": "swallow", "value": swallow}
   ],
 });
}
Note: The authorization for the bot must be in the format of “{conversationId} || {botId}”, then sha256 encoded. You will need to do this in whatever method your platform supports.
The postData method referenced above looks like this:
// Post data to Web View API
async function postData(url = '', auth, data = {}) {
 const response = await fetch(url, {
   method: 'POST',
   mode: 'cors',
   headers: {
     'Authorization': auth,
     'Content-Type': 'application/json',
   },
   body: JSON.stringify(data),
 });
 return await response.json();
};
Step 5: React to the submitted data in the bot
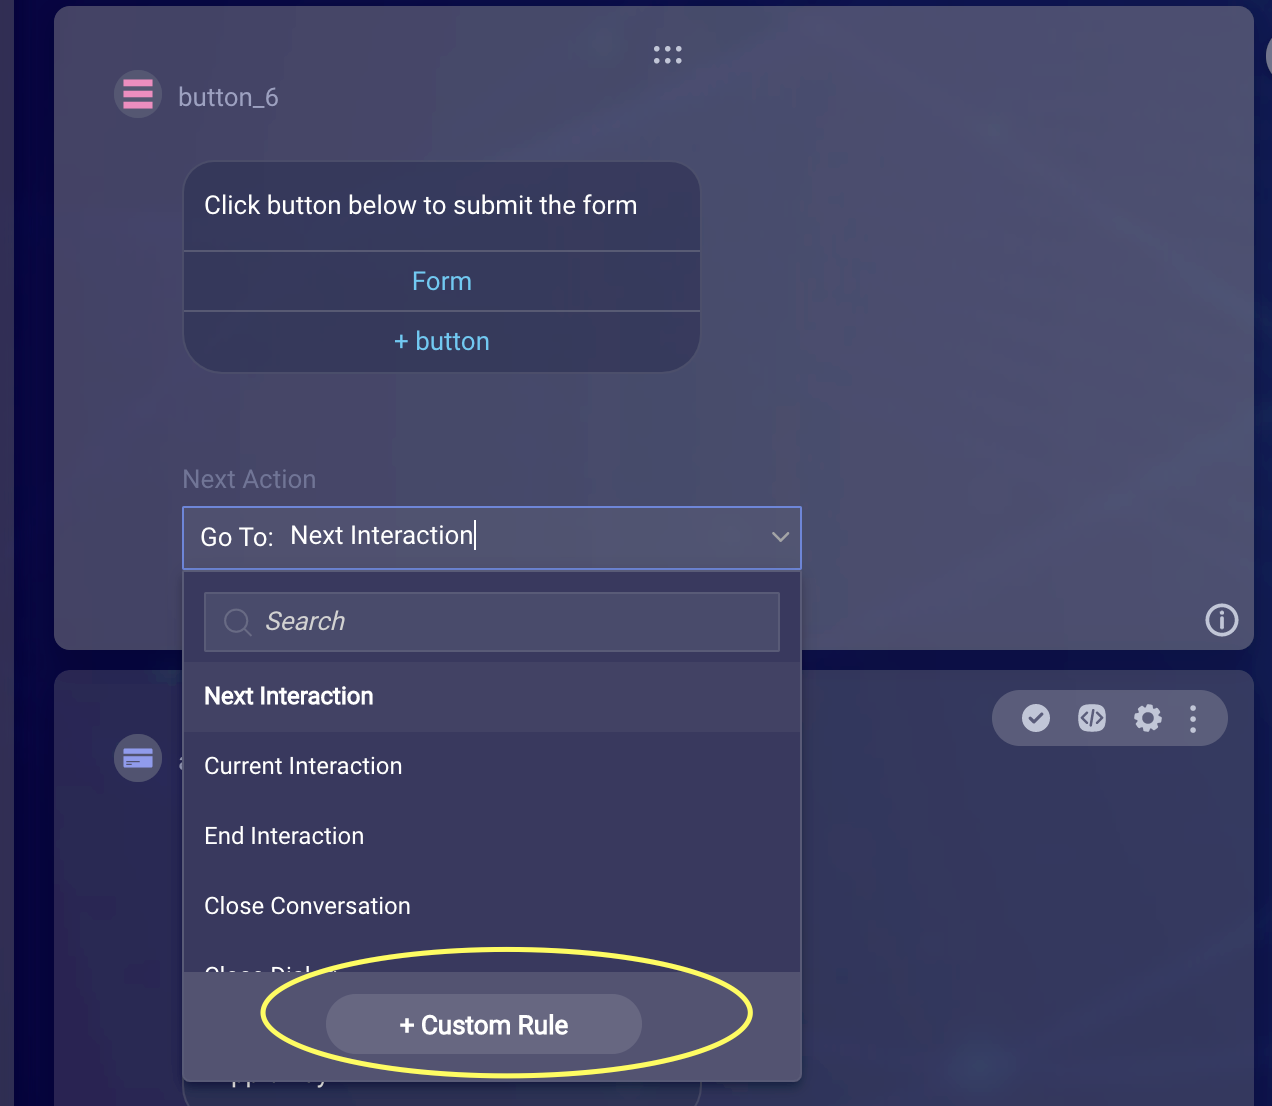
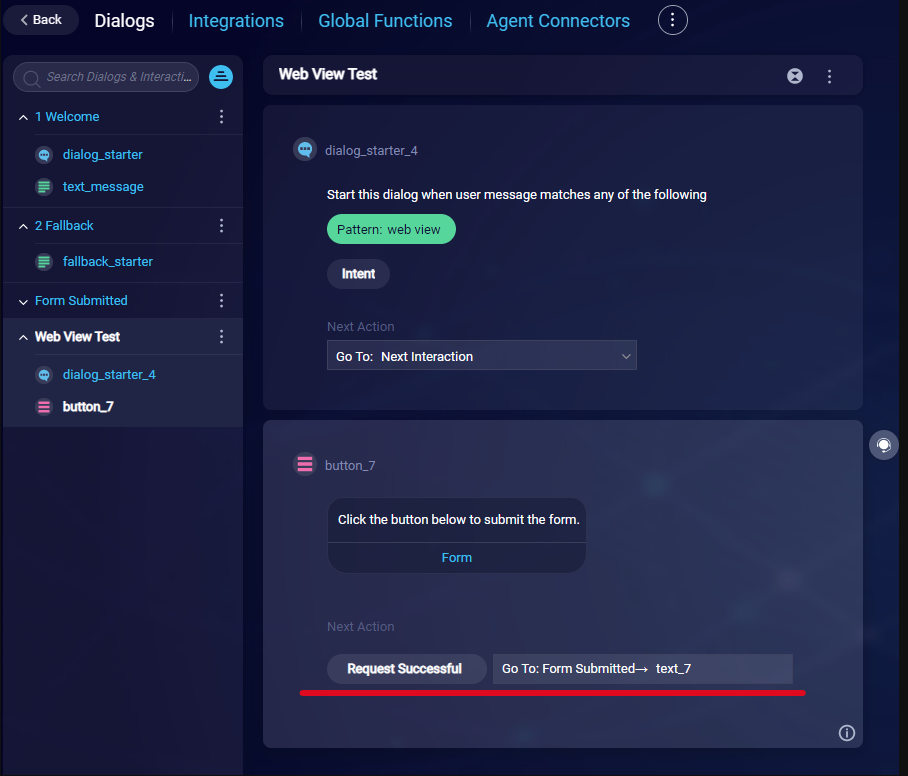
When we called the Web View Integration API upon submitting the form, we passed a “message” parameter with a value of “request successful.” This “message” can be used in the dialog flow. You can see in the images below that we have a custom rule to pattern match the message that we sent.
In the pre-process code for the interaction, we have the following code to retrieve the visitor’s name that was sent in the API payload. This value is then assigned to a bot variable, which we can use in the text interaction.
var visitor_name = botContext.getWebViewVariable('name');
var visitor_color = botContext.getWebViewVariable('color');
var visitor_swallow = botContext.getWebViewVariable('swallow');
botContext.setBotVariable('visitor_name', visitor_name, true, false);
botContext.setBotVariable('visitor_color', visitor_color, true, false);
botContext.setBotVariable('visitor_swallow', visitor_swallow, true, false);
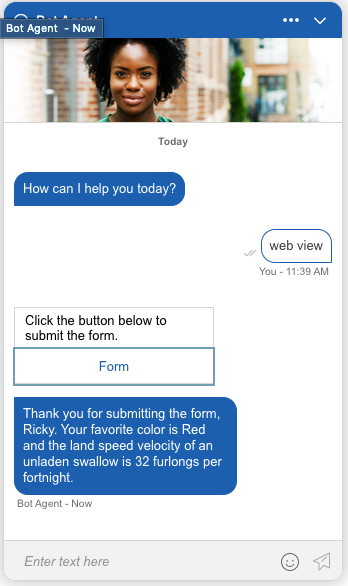
There's an end-to-end demo. Simply type “web view” to trigger the appropriate dialog. Click the link to access the form, fill it in, and then submit the form. The bot will then respond, confirming that the form was filled.
Ready to move on to the next capability? Click here to proceed.